How to Test Soil Before Fertilizing in 2026

Time:2026-09-25 Author:Madeline
0%

Before spreading fertilizer in 2026, pause with a clean trowel and a bucket. A soil test can reveal pH and nutrient levels that are invisible from the lawn’s color or a garden bed’s appearance. Why is soil testing important before fertilizing? Because applying nutrients without evidence may waste money, encourage excess growth, or leave a real deficiency untreated. A handful of dark soil is not a diagnosis.

For a useful sample, take small portions from several spots in the area you plan to treat. Avoid compost piles, recently fertilized patches, and the edge of a driveway. Mix the soil in a clean container, then follow the chosen laboratory’s instructions for depth, quantity, and packaging. Details matter. Different labs may request different amounts, and lawns, vegetable beds, and orchards may need different sampling depths. A local university extension service or reputable soil laboratory can explain its report and recommend amendments suited to your region and crop.

Read the results before choosing a fertilizer. Pay attention to pH, nutrient measurements, and application rates; more is not automatically better. Keep the report, note where each sample came from, and retest when local guidance recommends it. Soil can vary across a small yard, and one sample may miss a stubborn patch. I have to admit, sampling feels less satisfying than immediately feeding a struggling plant. Still, that extra check can prevent a costly guess—and gives the next fertilizer decision a firmer basis.
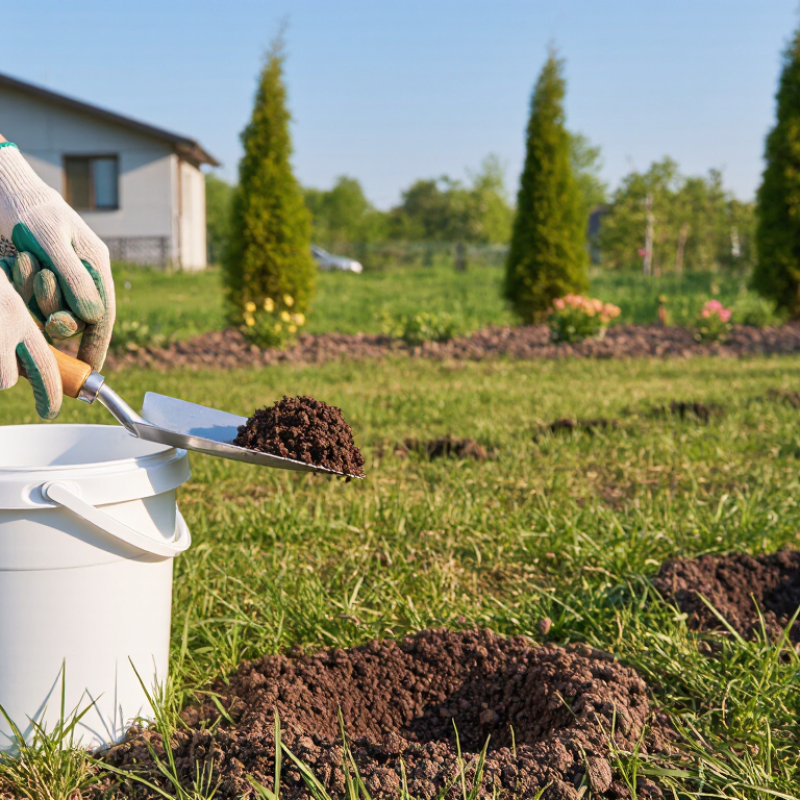
How to Test Soil Before Fertilizing in 2026

Identify the Soil Conditions and Nutrients to Evaluate

Before fertilizing, evaluate the soil itself, not only its nutrient numbers. Start with pH, because it affects how readily roots can use nutrients. Many vegetables grow well near pH 6.0–7.0, but crop needs vary. Note whether the ground stays wet after rain, dries quickly, or forms a hard crust. Sandy soil drains fast; clay soil may hold water and compact. A handful of moist soil offers clues, though it cannot replace a test. Check for plant residue and dark, crumbly organic matter. Also look for salt crusts, unusual discoloration, or poor growth in one area. These details help explain test results.

For nutrients, request available phosphorus and potassium, plus soil pH and, where relevant, organic matter. Nitrogen changes quickly, so a standard test may not predict seasonal supply; local guidance can help interpret it. Add micronutrient tests only when symptoms, crop history, or regional recommendations justify them. Sample several spots in the same bed, at a consistent depth, and mix them in a clean container. Avoid compost piles, fertilizer bands, and field edges. Send the sample to a qualified soil laboratory, and record the crop and recent amendments. One patch can still fool you. It is tempting to trust one number too much, but soil rarely behaves that neatly. Use the report alongside drainage, plant growth, and careful observation before choosing fertilizer.

How to Test Soil Before Fertilizing in 2026: Identify Soil Conditions and Nutrients to Evaluate

Example pH readings (illustrative only): Soil pH affects nutrient availability, but the preferred range depends on the crop and local conditions. Before adding fertilizer, use a soil test to check pH, organic matter, phosphorus, potassium, and—where relevant—nitrate-nitrogen. Follow the laboratory’s crop-specific recommendations; nutrient interpretations depend on the test method and soil.

Choose the Right Time and Locations for Soil Sampling

For useful results, collect soil several weeks before you plan to fertilize. That gives a laboratory time to test the sample and leaves room to adjust your plan. Fall is often practical for spring gardens, while early spring works before planting. Avoid sampling just after applying fertilizer, lime, or compost; these can distort results. Follow your laboratory’s guidance on how long to wait after an application. Soil should be workable, not waterlogged or frozen. A muddy sample is harder to mix evenly.

Choose locations that reflect how each area is used. A vegetable bed, lawn, and fruit-tree row should usually be tested separately because their needs differ. Within one uniform bed, walk a zigzag path and collect 10 to 15 small cores from evenly spaced spots. Keep the sampling depth consistent; garden samples often come from the top six to eight inches, while lawns may require shallower cores. Move aside surface leaves and thatch first. Keep them separate. Skip compost piles, burned patches, path edges, and places where water gathers. Use a clean tool and a clean bucket, then mix the cores before taking the lab portion.

I’ve found that “just one extra scoop” from a rich corner can skew a small sample. It is easy to miss that, so mark distinct problem areas and test them separately rather than averaging them in.

Collect and Prepare a Representative Soil Sample

Before fertilizing in 2026, collect a representative soil sample from the actual root zone. One handful is not enough. Walk the area in a zigzag pattern and take 15–20 cores from similar soil conditions. This sampling range follows common university extension and USDA NRCS guidance. Avoid unusual spots, including compost piles, wet depressions, field edges, and fertilizer bands. Keep it clean.

Use separate samples for lawns, vegetable beds, orchards, and shaded areas. Soil texture and management history can change sharply within a few meters. Remove surface debris, thatch, and stones before sampling. Mix the cores in a clean plastic bucket, then place about one cup of blended soil into the laboratory container. Do not use a metal bucket. It may contaminate some nutrient tests.

Label the sample with its location, depth, crop, and collection date. For most established beds, 6–8 inches is a practical depth; shallow-rooted turf needs less. The FAO and Intergovernmental Technical Panel on Soils reported that roughly 33% of global soils face moderate or severe degradation, making local measurement more useful than visual guessing. I sometimes sample too close to a visibly healthy plant. That can produce a flattering result. I now record the exact path and repeat sampling annually. Do not guess. A laboratory report is only as reliable as the soil submitted.

How to Test Soil Before Fertilizing in 2026 - Collect and Prepare a Representative Soil Sample

Sampling dimension Recommended practice Practical details Why it matters
Sampling area Sample one uniform area at a time. Keep areas with different soil types, past management, drainage, or intended plants in separate samples. A single sample commonly represents a consistent area of up to about 5 acres; smaller garden or lawn zones are often more useful. Combining unlike areas can hide nutrient differences and lead to an unsuitable fertilizer decision.
Number of soil cores Collect 10–15 cores from each uniform area and combine them. Walk a zigzag pattern and take cores from evenly spaced spots. Use the same sampling depth throughout the area. Multiple locations help average natural variation and make the composite sample more representative.
Sampling depth Use the depth appropriate for the site and follow the testing laboratory’s instructions. For established lawns, a common sampling depth is 3–4 inches. For garden beds and many other cultivated areas, 6–8 inches is commonly used. Soil conditions can differ by depth, so inconsistent or unsuitable depths may affect test results.
Tools and collection Use a clean soil probe, auger, or stainless-steel trowel and a clean plastic bucket. Remove surface leaves, grass, and loose organic debris before taking each core. Avoid rusty, dirty, or fertilizer-contaminated tools and containers. Clean equipment reduces the risk of contaminating the sample with material that can alter nutrient readings.
Locations to avoid Do not collect cores from unusual or recently disturbed spots. Avoid compost or manure piles, fertilizer bands, burn areas, field edges, wet depressions, and spots beside roads or buildings unless that specific spot is being investigated. Unusual locations may not reflect the area being managed as a whole.
Soil condition and timing Sample when soil is workable and not waterlogged; allow time for results before fertilizing or planting. Do not sample frozen soil. Avoid sampling immediately after applying fertilizer, lime, compost, or manure; follow the laboratory’s advice about timing after an application. Wet or recently amended soil may be difficult to handle or may not represent the area’s usual nutrient status.
Mixing the composite sample Combine all cores from one area and mix thoroughly. Break up clods and remove stones, roots, and plant debris. Do not combine samples from separate management areas. Thorough mixing helps ensure the submitted portion represents all the collected cores.
Preparing the sample Submit the amount requested by the testing laboratory. If the laboratory permits, spread the mixed soil on clean paper and air-dry it at room temperature. Do not heat it in an oven. Place the prepared soil in the laboratory’s specified container. Preparation and packaging requirements vary by test, so laboratory instructions take priority.
Label and test request Identify each sample and describe the intended use. Record the area, sampling depth, date, crop or lawn type, and recent soil amendments. Request tests relevant to the planned use, commonly including soil pH and nutrient levels. Clear records help match results and fertilizer recommendations to the correct area and intended plants.

Note: Sampling depths, sample amounts, and preparation requirements can vary by region and test. Follow the instructions provided by the soil-testing laboratory you use.

Test the Sample with a Soil Kit or Laboratory

Before fertilizing, test the soil instead of guessing what your plants need. A healthy-looking garden can still lack phosphorus or contain excessive salts. I use a clean trowel and plastic bucket for sampling. Take 10 to 15 small samples from the same planting area. Collect soil six to eight inches deep for vegetables and flowers. Avoid recently fertilized spots, compost piles, and visibly wet areas. Mix the samples thoroughly, then remove stones and roots. A poor sample creates misleading results.

A home soil kit can provide quick readings for pH, nitrogen, phosphorus, and potassium. Follow its instructions carefully, especially when measuring water and soil. Small errors can change the color result. The kit is useful for routine checks, but it is not infallible. For reliable recommendations, send a mixed sample to an independent agricultural laboratory. Request organic matter, soluble salts, and micronutrient testing when appropriate. Laboratory results usually include target ranges and fertilizer guidance.

Read the report before buying any product. A low nutrient value does not always justify heavy application. Soil texture, drainage, crop type, and previous treatments also matter. Record the sample date, location, test method, and recent amendments. I once tested soil immediately after adding compost, which confused the comparison. That mistake reminded me to wait and keep better records. If results seem unusual, repeat the test or ask a qualified soil specialist for interpretation.

Interpret the Results Before Choosing Fertilizer

How to Test Soil Before Fertilizing in 2026

Interpret the Results Before Choosing Fertilizer

A soil report is a diagnosis, not a shopping list. Check crop-specific recommendations before buying fertilizer. Read pH first: it affects nutrient availability and can explain weak growth despite adequate phosphorus or potassium. USDA NRCS guidance in Soil Quality Indicators: pH places the favorable range for many crops at about 6.0–7.0. Specialty crops may need different conditions. Next, note whether each nutrient is rated low, optimum, or high. A high result means extra fertilizer could worsen an imbalance, not improve growth.

Use the recommended application rate, and check its units: pounds per 1,000 square feet is not the same as pounds per acre. Soil-test phosphorus and potassium values are not fertilizer rates. For example, a hypothetical report showing pH 5.4 and high phosphorus could indicate a need to investigate lime, but not add phosphorus. Confirm lime requirements using the lab’s buffer-pH result or recommendation; pH alone cannot determine the rate. Organic matter and cation exchange capacity provide useful context, too.

Tips: Sample several spots at the same depth, avoiding compost piles and fertilizer bands. Keep a record of the lab, date, and crop. Local extension guidance can help interpret results because recommendations vary by region. If a result looks surprising, retesting is wiser than guessing.

FAQS

When should I collect soil before fertilizing?

Collect it several weeks before fertilizing. Fall often suits spring gardens, while early spring works before planting. Soil should be workable, not frozen or waterlogged.

How many soil samples should I combine?

For one uniform bed, collect 10 to 15 small cores along a zigzag path. Mix them evenly before sending a portion for testing. Keep it clean.

How deep should I sample garden soil?

For vegetables and flowers, collect soil from six to eight inches deep. Lawn samples are often shallower. Use the same depth throughout each area.

Should I test different parts of my yard separately?

Yes. Test vegetable beds, lawns, and fruit-tree rows separately when their uses differ. Skip path edges, compost piles, burned patches, and wet spots.

Can I use a home soil test kit?

A home kit can quickly estimate pH and major nutrients. Follow its measuring instructions carefully; a small water or soil error can change the result.

What does a laboratory soil report tell me?

It may report pH, nutrient levels, organic matter, and soluble salts. Recommendations can help, but crop type, drainage, and past treatments still matter.

What should I check before choosing fertilizer?

Read crop-specific guidance and note whether nutrients are low, optimum, or high. High phosphorus, for example, is not a reason to add more.

Can soil pH alone tell me how much lime to use?

No. Ask the laboratory for its lime recommendation or buffer-pH result. I once treated pH as enough; that was too simple.

What if my soil test result seems surprising?

Check your sampling notes and recent amendments. If the result still looks odd, repeat the test or ask a qualified soil specialist. Don’t guess.

Conclusion

Before fertilizing in 2026, assess the soil’s texture, drainage, pH, organic matter, and available nutrients such as nitrogen, phosphorus, and potassium. Why is soil testing important before fertilizing? It helps reveal what the soil already contains, prevents unnecessary applications, supports healthier plant growth, and reduces the risk of nutrient imbalance. Choose an appropriate sampling time, preferably before planting or fertilizing, and collect soil from several representative locations rather than relying on one spot.

Remove surface debris, mix the collected cores thoroughly, and prepare a clean, labeled sample according to the testing instructions. You can use a reliable home soil kit for basic information or submit the sample to a laboratory for more detailed analysis. Once the results are available, compare nutrient levels and pH with the needs of the plants you plan to grow. Then select the type, amount, and timing of fertilizer based on the results instead of applying nutrients by guesswork.

Madeline

Madeline

Madeline is a dedicated marketing professional with a wealth of expertise in our company's core offerings. With a keen understanding of the industry, she brings a unique perspective to her role, consistently delivering high-quality content that highlights the superior aspects of our products. As......