Liquid fertilizer can support steady growth, but only when its strength and timing suit the plant. Too much may scorch roots or leaves, while too little may not correct pale growth. Small details matter.
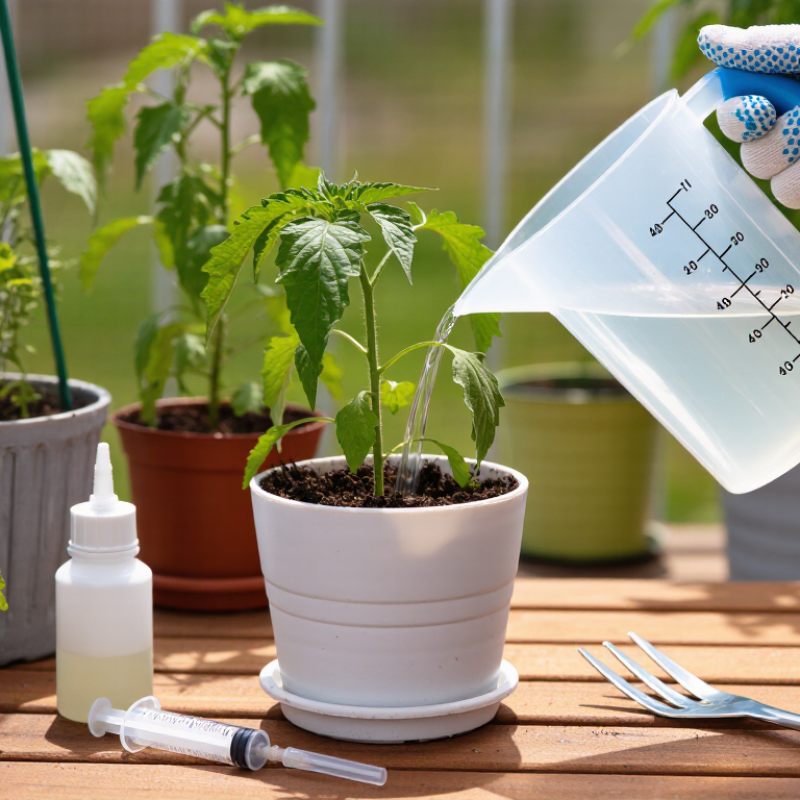
How to apply liquid fertilizer properly starts with reading the product label, not guessing from a bottle cap. Labels specify dilution, suitable plants, application frequency, and whether the solution belongs on soil or foliage. Use a measuring jug or syringe, then mix only what you need. A slightly moist root zone often accepts diluted fertilizer more evenly than bone-dry potting mix. Still, watering needs vary with soil, weather, and plant type.
This guide explores seven practical methods, from selecting a suitable formula to measuring and spreading it evenly. It also covers timing, placement, foliar feeding when the label permits it, and cleaning equipment after use. Apply during cooler parts of the day when possible, and follow label directions for edible crops. Keep fertilizer off paths and away from drains. Avoid feeding stressed, dormant, or newly transplanted plants unless the product directions advise otherwise. Watch new growth over the following days, but remember that yellow leaves can have causes beyond nutrition. No single schedule fits every garden. Check the results, adjust cautiously, and let the plants—not guesswork—guide your next application.
Identify the Right Liquid Fertilizer for Your Plants
Choosing a liquid fertilizer starts with the plant, not the bottle. Leafy vegetables often need more nitrogen for steady foliage, while flowering plants may benefit from a formula labeled for blooms. Check the N-P-K numbers, which show the proportions of nitrogen, phosphorus, and potassium. Then read the label for dilution rates and suitable plants. A higher number does not automatically mean better results. Roots can suffer when fertilizer is too concentrated, especially in dry soil.
Tips: Match the product to the plant’s growth stage. Look for a clear ingredient list and follow the dilution instructions. For a new fertilizer, test it on one or two plants first. Small test, useful evidence.
Consider your soil and watering habits, too. A container plant watered often may lose nutrients faster than a garden plant, but frequent feeding can also cause salt buildup. If leaf tips turn brown or a pale crust forms on the soil, pause feeding and review the label and watering routine. Keep a simple note of the product, dilution, and date. Results may take time, and not every yellow leaf signals a fertilizer problem. Pests, poor drainage, and low light can look similar. It is easy to misread the signs.
Before mixing, read the fertilizer label for the crop, application method, and dilution rate. Rates can differ between foliar feeding and soil application, so do not reuse a ratio from another product. Check the label’s units, too: millilitres per litre is not the same as ounces per gallon. Measure the required water in a clean container, then use a marked syringe or measuring cup for the concentrate. It is easy to rush this step. I double-check the arithmetic before pouring.
For example, if the label calls for 15 mL in 4 L of water, half that batch needs 7.5 mL in 2 L. Keep the same ratio when scaling up or down. The International Fertilizer Association’s 2023 outlook estimated global fertilizer nutrient consumption at about 192.5 million tonnes in 2022/23. That figure is a reminder that fertilizer use is substantial; careful dosing helps avoid needless excess. Never make a mix stronger to speed results. If the label is unclear, contact a local extension service before applying.
Tips: Add concentrate to water, not water to concentrate, unless the label says otherwise. Stir gently, wear gloves, and label the container. A small measuring error can matter. Don’t guess.
These examples show the concentrate volume needed to make 1 liter of finished solution. Ratios are concentrate-to-final-solution; for example, 1:100 means 10 mL of concentrate per liter. They illustrate the calculation only—not recommended application rates. Always follow the fertilizer label.
Test soil moisture before applying liquid fertilizer. Dry soil can concentrate salts around roots. Saturated soil can move nutrients beyond the root zone.
Use a hand probe, soil feel test, or calibrated moisture sensor. University of Nebraska–Lincoln Extension often uses about 50% available-water depletion as an irrigation trigger for many crops, but crop and soil texture change that point. Sandy soil dries quickly. Clay soil holds water longer. A sensor reading of 20–30 centibars may signal irrigation in coarse soil, while heavier soil may tolerate higher readings. Treat these values as starting points, not universal rules.
Choose a calm application window after light irrigation or rainfall has moistened the root zone. Avoid spraying before heavy rain. The U.S. Environmental Protection Agency’s National Rivers and Streams Assessment identifies nitrogen and phosphorus as widespread water-quality stressors. This supports careful timing and smaller applications. Apply early in the morning or near sunset when temperatures are cooler and evaporation is lower. Do not fertilize waterlogged ground.
I still make this mistake: a green surface can hide dry soil below. Dig 10–15 centimeters and check the root zone directly. Follow the product label, divide the required dose, and keep records of soil moisture, weather, and plant response. One reading is never enough. Recheck tomorrow.
Applying liquid fertilizer evenly starts with knowing what the soil or plant actually needs. A soil test can reveal nutrient shortages and prevent unnecessary applications. Read the product label carefully, then measure the concentrate with a marked container. Guessing the dilution is a common mistake. Even coverage matters more than speed.
For soil application, water the ground lightly if it is completely dry. Use a watering can or calibrated sprayer, and move at a steady walking pace. Overlap each pass slightly, but avoid creating puddles around stems. Keep the solution away from bare skin and follow the stated safety directions. I once moved too quickly across a garden bed, leaving darker, overfed patches near the entrance. The plants recovered, but the uneven growth was obvious.
Foliar feeding requires a finer spray and a clean, functioning nozzle. Apply until leaves are evenly misted, not dripping. Spray both leaf surfaces when the instructions allow it, because undersides may absorb nutrients efficiently. Choose a cool, calm period, preferably early morning or late afternoon. Strong sunlight, wind, or high heat can increase leaf stress. Test the diluted solution on a few leaves first. Some plants react badly, even when the mixture seems mild. Clean the sprayer after use, because residue can alter the next application.
| No. | Best Practice | Recommended Application Method | Useful Data Point | Main Benefit | Important Caution |
|---|---|---|---|---|---|
| 1 | Read the fertilizer label first | Follow the stated dilution, crop, application frequency, and safety instructions before mixing or applying. | Fertilizer strength varies widely by product, so there is no single safe dilution for every formulation. | Matches nutrient delivery to the crop and product formulation. | Never assume that a stronger solution will produce faster or better growth. |
| 2 | Measure accurately and mix thoroughly | Measure the concentrate with a clean tool, add it to the required volume of water, and stir until evenly mixed. | Use a calibrated measuring container and keep the water-to-fertilizer ratio consistent for every batch. | Reduces the risk of concentrated patches and uneven nutrient supply. | Avoid mixing products together unless their labels confirm compatibility. |
| 3 | Apply to already-moist soil | Water dry soil lightly first, then apply the diluted fertilizer evenly around the root zone. | Moist soil helps distribute soluble nutrients and lowers the chance of root injury from concentrated salts. | Improves nutrient movement into the active root area. | Do not apply to waterlogged soil, where roots may lack oxygen and nutrients may move away. |
| 4 | Distribute soil applications evenly | Use a watering can, hose-end applicator, or calibrated sprayer and move at a steady pace across the planting area. | Treat the complete root zone rather than repeatedly applying to one spot near the stem. | Promotes more uniform plant growth and nutrient availability. | Keep fertilizer off hard surfaces to reduce runoff into drains and waterways. |
| 5 | Spray foliage only under suitable conditions | Apply a properly diluted foliar solution as a fine, even mist to clean leaves when the label permits foliar use. | Choose cool, calm conditions and allow leaves to dry gradually; early morning or late afternoon is generally less stressful than hot midday conditions. | Provides a rapid supplemental nutrient route when appropriate. | Avoid hot sun, freezing conditions, strong wind, open flowers, and visibly stressed or wilted plants. |
| 6 | Test a small area before full application | Apply the diluted solution to a few leaves or a small soil section first, then observe the plants before treating the entire area. | Allow at least 24 hours for an initial foliage-response check when testing a foliar application. | Helps reveal sensitivity, incompatibility, or excessive concentration early. | Stop application if leaf spotting, scorching, curling, or other injury appears. |
| 7 | Choose the timing and frequency carefully | Apply during active growth only when plants need nutrients, and base repeat applications on the label, crop stage, and soil-test information where available. | Do not fertilize drought-stressed, newly transplanted, dormant, or severely damaged plants until they have recovered unless product directions state otherwise. | Supports steady growth while reducing nutrient waste and salt accumulation. | Excess nitrogen can encourage weak growth and increase the risk of nutrient runoff. |
Note: Application rates and frequency should always follow the fertilizer label and the needs of the specific crop, soil, and growing conditions.
After applying liquid fertilizer, watch the plant rather than trusting the measuring cup alone. Check leaves, stems, and new growth over the next seven to fourteen days. Healthy plants usually show steady color and firmer growth, not sudden, oversized leaves.
Look closely at the leaf edges. Brown tips, curling, or a white crust on the soil may indicate excess fertilizer or poor watering. Pale new leaves can suggest a nutrient shortage, but they can also signal damaged roots or unsuitable soil pH. A simple soil test provides better evidence than guesswork. I record the product dilution, application date, weather, and visible changes in a notebook.
Keep it simple. Adjust one factor at a time. If growth improves, repeat the same dilution only when the plant and soil require it. If symptoms worsen, pause feeding and water carefully to reduce soluble salts, provided drainage is adequate. I once increased feeding after seeing pale leaves, but the real problem was waterlogged soil. That mistake changed my routine. Now I inspect drainage and root conditions before adding more nutrients. Future applications should respond to measured plant needs, seasonal growth, and soil test results, not a fixed calendar.
Follow the label for your crop and application method. Foliar and soil rates can differ. Never guess.
Keep the same ratio. For example, 15 mL in 4 L becomes 7.5 mL in 2 L. Double-check the math.
Use a clean container for water and a marked syringe or measuring cup for concentrate. Small errors matter.
Add concentrate to water unless the label says otherwise. Stir gently, wear gloves, and label the container.
Watch leaves, stems, and new growth for seven to fourteen days. Look for steady color and firmer growth.
Brown leaf tips, curling, or a white soil crust can signal excess fertilizer or poor watering. Check the growing conditions.
No. Damaged roots or unsuitable soil pH can also cause pale leaves. A soil test offers better evidence than guessing.
Pause fertilizer. If drainage is adequate, water carefully to reduce soluble salts. Inspect the roots and soil before changing anything else.
Not necessarily. Consider plant needs, seasonal growth, and soil test results. I once fed pale leaves, but waterlogged soil was the real problem.
Learning how to apply liquid fertilizer properly begins with choosing a formula that matches your plants’ type, growth stage, and nutritional needs. Read the product instructions carefully, prepare the solution with clean water, and calculate the correct dilution instead of guessing. Using too much fertilizer can damage roots and leaves, while too little may not provide meaningful benefits. Before application, check the soil moisture and avoid fertilizing plants that are extremely dry or waterlogged. Applying fertilizer when temperatures are moderate can also help reduce plant stress.
Distribute the diluted fertilizer evenly across the soil around the root zone, or apply it to the foliage only when the formula is suitable for foliar feeding. Avoid concentrating the solution in one area or applying it during intense heat and direct sunlight. Afterward, observe changes in leaf color, growth, and overall health. If plants show signs of stress or excessive growth, adjust the strength, frequency, or timing of future applications. Consistent monitoring helps create a safe and effective feeding routine.

TH Fertilizer